Saturday, November 29, 2008

My first Daring Bakers Challenge!

WOW! this was such an exciting day.. My first ever Daring Bakers challenge!!
We had to make a lovely Caramel Cake witha very unique caramelized butter frosting that Shuna Fish Lydon posted on Bay area bites. And by the way she has a brilliant blog too.

I loved it so much, I made it TWICE.

My first cake was just as the recipe called for..

CARAMEL CAKE WITH CARAMELIZED BUTTER FROSTING

10 Tablespoons unsalted butter at room temperature
1 1/4 Cups granulated sugar
1/2 teaspoon kosher salt
1/3 Cup Caramel Syrup (see recipe below)
2 each eggs, at room temperature
splash vanilla extract
2 Cups all-purpose flour
1/2 teaspoon baking powder
1 cup milk, at room temperature

1.Preheat oven to 350F

2.Butter one tall (2 – 2.5 inch deep) 9-inch cake pan.

3.In the bowl of a stand mixer fitted with a paddle attachment, cream butter until smooth. Add sugar and salt & cream until light and fluffy.

4.Slowly pour room temperature caramel syrup into bowl. Scrape down bowl and increase speed. Add eggs/vanilla extract a little at a time, mixing well after each addition. Scrape down bowl again, beat mixture until light and uniform.

5.Sift flour and baking powder.

6.Turn mixer to lowest speed, and add one third of the dry ingredients. When incorporated, add half of the milk, a little at a time. Add another third of the dry ingredients, then the other half of the milk and finish with the dry ingredients. {This is called the dry, wet, dry, wet, dry method in cake making. It is often employed when there is a high proportion of liquid in the batter.}

7.Take off mixer and by hand, use a spatula to do a few last folds, making sure batter is uniform. Turn batter into prepared cake pan.

8.Place cake pan on cookie sheet or 1/2 sheet pan. Set first timer for 30 minutes, rotate pan and set timer for another 15-20 minutes. Your own oven will set the pace. Bake until sides pull away from the pan and skewer inserted in middle comes out clean. Cool cake completely before icing it.

9.Cake will keep for three days outside of the refrigerator.

CARAMEL SYRUP

2 cups sugar
1/2 cup water
1 cup water (for "stopping" the caramelization process)

1.In a small stainless steel saucepan, with tall sides, mix water and sugar until mixture feels like wet sand. Brush down any stray sugar crystals with wet pastry brush. Turn on heat to highest flame. Cook until smoking slightly: dark amber.

2.When color is achieved, very carefully pour in one cup of water. Caramel will jump and sputter about! It is very dangerous, so have long sleeves on and be prepared to step back.

3.Whisk over medium heat until it has reduced slightly and feels sticky between two fingers. {Obviously wait for it to cool on a spoon before touching it.}

Note: For safety reasons, have ready a bowl of ice water to plunge your hands into if any caramel should land on your skin.

CARAMELIZED BUTTER FROSTING

12 tablespoons unsalted butter
1 pound confectioner’s sugar, sifted
4-6 tablespoons heavy cream
2 teaspoons vanilla extract
2-4 tablespoons caramel syrup
Kosher or sea salt to taste

1.Cook butter until brown. Pour through a fine meshed sieve into a heatproof bowl, set aside to cool.

2.Pour cooled brown butter into mixer bowl.

3.In a stand mixer fitted with a paddle or whisk attachment, add confectioner's sugar a little at a time. When mixture looks too chunky to take any more, add a bit of cream and or caramel syrup. Repeat until mixture looks smooth and all confectioner's sugar has been incorporated. Add salt to taste.

Note: Caramelized butter frosting will keep in fridge for up to a month.
To smooth out from cold, microwave a bit, then mix with paddle attachment until smooth and light


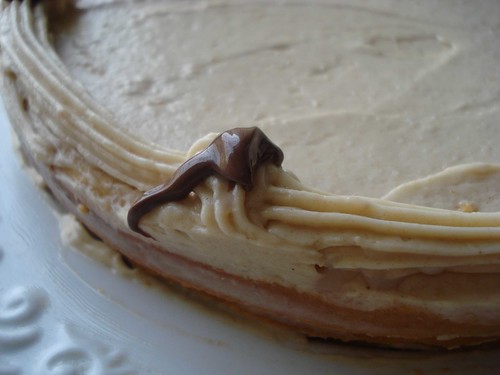
And Voila!
q-DSC02070
Yes that is nutella..

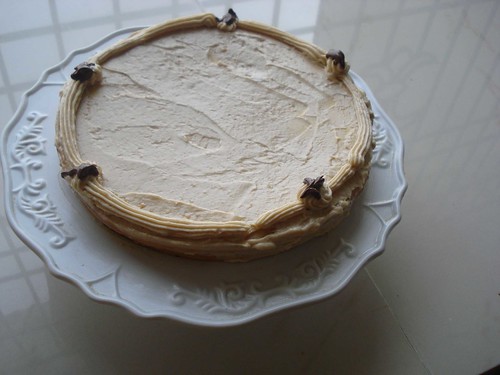
I kept the frosting casual and used it quite sparingly. The cake is quite sweet.
q-DSC02064

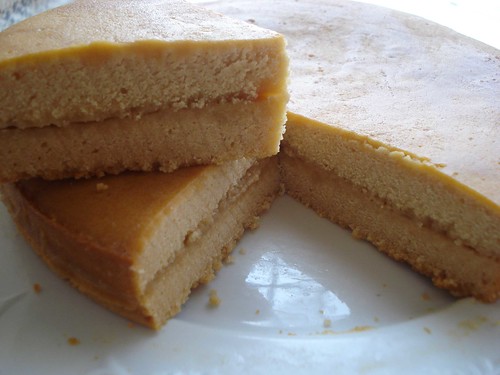
The second time I made it, I used Splenda and did not ice the cake on top just sandwiched the cake with some butter-caramel frosting made with Splenda. It still tasted great.
q-DSC02039


So summing up: my experience as a daring baker has been awesome. I want to thanks Lis and Ivonne for letting me be a part of this wonderful community. I'm eager to know whats up next month :D

Friday, November 28, 2008

Sun dried Tomatoes

Have you ever died tomatoes in the sun? We'll I have and its fun!

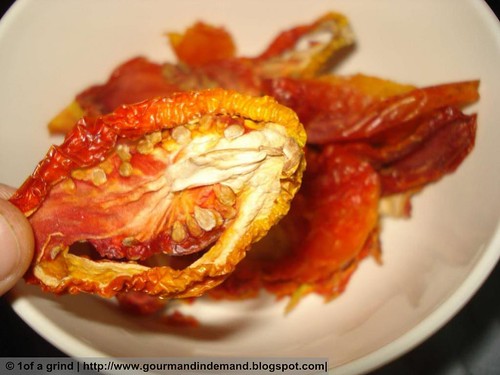
I dried some a while back and I have to tell you I loved the results.The tomato miraculously transforms into a chewy candy which has a strikingly intense flavor. It tasted great as a filling for the bread I made and also as a dip.

Its quite simple to do and once you do it this way, you don't need to buy the oil soaked ones from a store.

If you stay in a sunny place (I do, its even hot in winter) you can do this with such ease its not even funny. But if you don't you can use an oven to speed up the process.

What you need:

Large tomatoes, as many as you want
Salt
baking sheet/tray
Cheesecloth
The Sun or an Oven

What you need to do:

1. Slice the tomatoes into very thin slices and lay them onto the baking tray(s)
2. Sprinkle salt all over them
3. Cover with the cheesecloth
4. Leave to dry where there is direct sunlight
5. It takes about a 7-11 days depending on the sun but you can use an oven after drying them out for a while. Also make sure to refrigerate at night.


I know, they look fab. They taste even better
Sundried toamtoes

Thursday, November 20, 2008

Super Easy Ice Cream Cake

I will be really busy in the next couple of days so I'm writing two scheduled posts today.

OK so this was NOT low fat. Unlike my last post this one is loaded with calories and despite my diet, I did this one for a couple of friends who came over to work on a project. But only we know how much WORK we ended up doing *wink wink*

Anyway back to the cake. I love Nigella's show andI saw this recipe on Nigella Express and I just had to make it-- but of course with my modifications (a girls gotta have some individuality right?) Nigella made hers too rich with a lot of chocolate chips and way too much caramel sauce mine was even more express and lighter.

What you need:

1.5 liter carton of Vanilla ice cream
5-6 chocolate covered biscuit chocolate bars like Kit-Kat
1/2 cup granulated sugar
2 tbs butter
2 tbs single cream
1/4 cup water


What to do:

1. Make a caramel butter suace: Melt the sugar and caramelize it. When caramelising quickly add the cream and stir. Be careful it really splutters. Then add the butter as well stir until sauce is thick and of one consistency.

2. Crush the chocolate bars either with your bare hands or using a rolling pin or a like instrument, into coarse pieces.

3. Soften the ice cream and using a hand whisk or an electronic whisk on a low speed, incorporate the softened ice cream with the chocolate. Stir in some caramel sauce as per your taste.

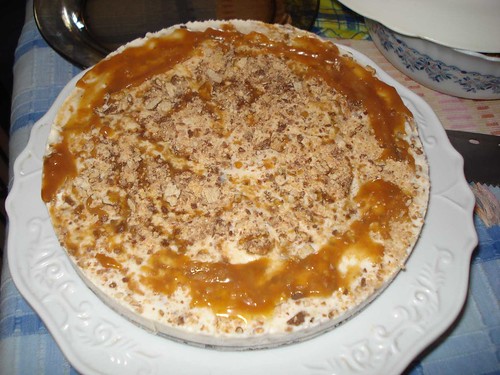
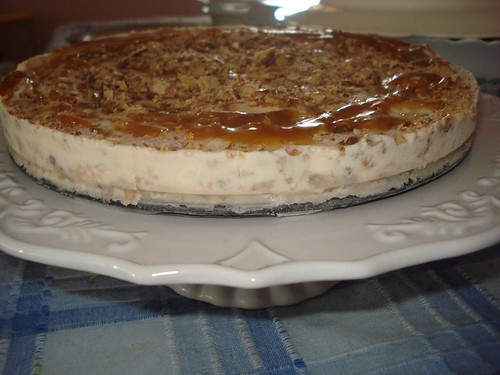
4. Pour in a clip cake tin and set till firm. You can top a little caramel sauce while serving as well.

5. Cut into slices and as I always say, enjoy!


q-icecreamcake


q-icecreamcake2

Tuesday, November 18, 2008

REALLY Low Fat Strawberry Cheesecake

I've been really trying to cut down on the calories but It's so hard to do with my sweet tooth. I almost always crave for dessert. I often just chew on fruits to curb my sugar attack but today I needed something more.

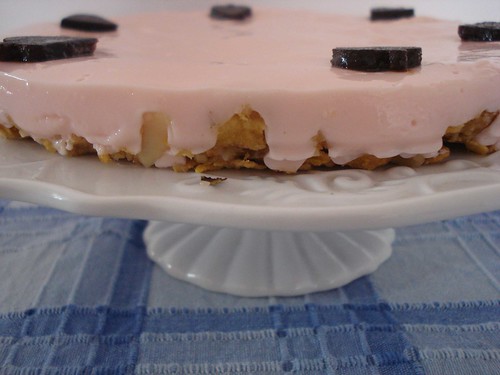
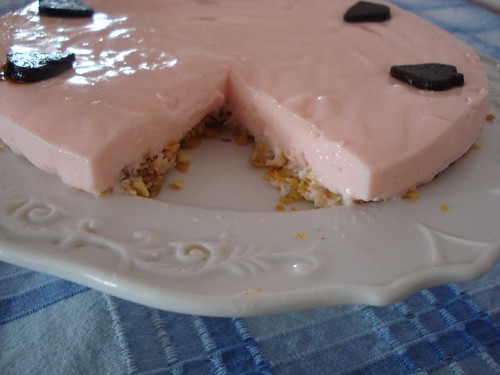
I made a cheesecake. You must think I must be totally out of my head to even consider that a term that contains the words "Cheese" and "Cake" could ever be low fat. I'm here to prove you wrong. I made a Strawberry Cheesecake without cheese and strawberries.

What you need:

1 package strawberry flavored low-fat, sugar-free pudding mix. [One that asks you to mix 750 ml (3cups) to it]
1 cup of low-fat yogurt, hung for 2-3 hours or just use a really creamy variety without the hanging
1 cup of muesli
1 tbs melted butter or yogurt whey
1 tbs powdered gelatin
1 bar strawberry fruit bar (optional)

What you need to do:

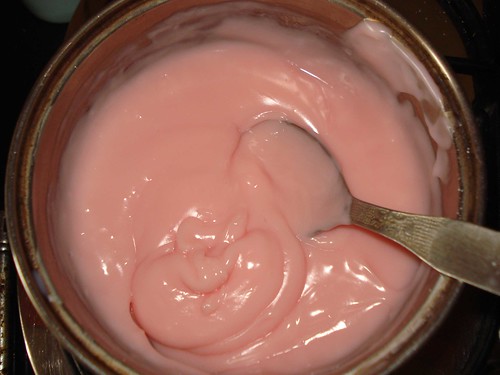
1. Prepare pudding as per instructions only one major modification: reduce the 750 ml(3cups) of milk to 500(2cups) ml of milk. You need to get a really thick and extra sweet pudding. Leave aside to cool.

2. Crush the muesli in a bowl and pour melted butter or whey (makes it slightly soggy but if your really cutting down this is the way to go) and line in a clip cake tin or quiche tin. Freeze for 10 minutes.

3. Puree the cooled pudding with the yogurt and pour into a mixing bowl.

4. Dissolve gelatin in hot water and pour into the pudding mix, stir vigorously. Pour over muesli lined tin. Refrigerate for 2-3 hours till firm and set.

5. Cut pieces of the strawberry bar for garnish.(optional)

6. Cut into REALLY large slices and enjoy; you can afford to!


The pudding should look this thick:

q-DSC02084


And that's the final cheesecake:

q-DSC02094


q-DSC02104

q-DSC02105

Friday, November 7, 2008

Stuffed Chicken Steaks with Coconut Sauce

The other day I saw this recipe on TV and I just wanted to try it so so so badly!! it looked so good just watching it made my mouth water.

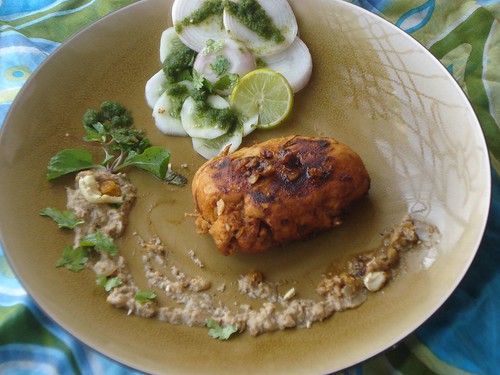
This one is rich in spices but has a rather simple preparation. Chicken breasts are marinaded and then stuffed with cottage cheese and herbs and broiled in hot water that has been tempered with spices. The sauce is prepared separately and topped on the cooked chicken just before serving.

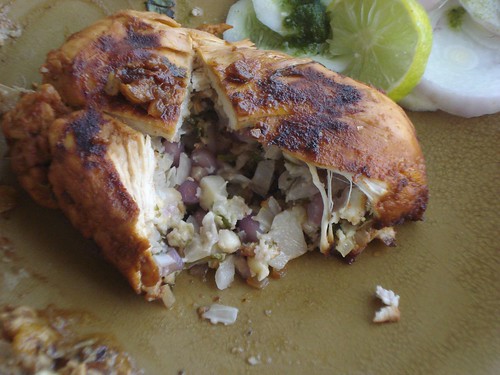
I loved the result. However I was not satisfied with the stuffing. The original recipe called for pomegranate seeds and chopped onion in the stuffing along with other things but personally I didn't like the taste of the hot pomegranate and soggy onion. In fact the onion turned the pomegranate into a pale shade of purple and it looked quite strange so it's best avoided. It is a rich dish, but if you want it really light avoid the cheese in the stuffing and you can have this without the sauce. It's lovely and light without the sauce and the cheese and still great in taste.


q-DSC01864

What you need:

For the Marinade:

4 chicken breasts, pounded and flattened
1½ tbs ginger paste
1½ tbs garlic paste
2 tsp chili powder
1 tsp cumin seeds powder
juice of half a lemon
Salt as per taste


For the stuffing:

1 cup cottage cheese, crumbled
¼ cup grated cheese (any one that melts really well)
2 tbs coriander leaves
½ tsp chopped green chilies
juice of half a lemon
Salt as per taste


For the broil:

4-5 sticks of cinnamon
4-5 green cardamoms
1 tsp mace powder
a few black peppercorns
2 tsp of clarified butter or oil


For the Sauce:

½ cup cashews
½ cup dessicated coconut
1 tbs butter or oil
1 tsp ginger paste
1 tsp garlic paste
½ cup whisked yogurt
½ tsp fennel seed powder
½ tsp green cardamom powder
a pinch of mace powder
a pinch of nutmeg powder
1 tsp chili powder
1½ tsp black cardamom powder
Salt as per taste


What you need to do:

1. Marinade: marinade the chicken breasts with the spices listed for the marinade. Keep aside for 30 minutes.

2. Stuffing: Mix all the ingredients for the stuffing and divide into four parts. Lay it on each marinaded chicken breast and join edges of the chicken. Secure with toothpicks.

3. Broil: Heat the clarified butter/oil in a large deep bottomed dish and add the listed spices. When spices splutter, pour about 1½ cups of water into the dish and immediately place the stuffed chicken breasts. Cover the dish with a lid or aluminum foil and cook over a low heat for 20-25 minutes till well done. Add more water if needed.

4. Prepare Sauce: Dry roast the cashews and dessicated coconut till browned and then puree with a little water. In a wok heat the oil/butter, add ginger, garlic and when it browns add the yogurt and salt and let it cook for a while. Then add the cashew and coconut paste and rest of listed spices and saute for 5 min. In the end add 3-4 tbs of the water left behind after the steaks have broiled and stir well.

5. Serve: Place the chicken breasts on a dish and pour the gravy over it. Enjoy!


q-DSC01868


That's how the original version looked from inside.. but the onions and pomegranate seeds are not mentioned in the modified and better version listed above. This dish was a real winner.

Wednesday, November 5, 2008

And all that I can see is just another lemon-tree

My mum has this little potted lemon tree in the house. We'll I thought it was a lemon tree but the other day one lemon fell off and we opened it and saw something of an orange. It takes EONS to grow and the little lemon/orange/wild citrus fruit, has been growing for nearly 3 months. It just doesn't get any bigger!


q-DSC01708


The pretty pot that it is in.


q-DSC01706


the lemon up close. Cute right?