Showing posts with label Healthy. Show all posts

Friday, February 13, 2009

Mulberries and smoothies

I remember that silly rhyme we would sing as kids, round and round the mulberry tree. The fruit is not silly though.

It resembles a blackberry but has these tentacle like thingies all over (forgive me for not knowing the scientific word, this is a food blog)

I bought some of these but really didn't know what to do with it. I remember Patrick Star (of Spongebob Squarepants) once say: "when in doubt, pinkie out!" (that REALLY did not help)

SO I created a new one "when in doubt, blender out!"

I made a dee-licious smoothie with the mulberries and strangely a larger quantity of other stuff.

What you need:

¼ cup mulberries
½ cup diced papaya
1 cup cold milk
honey to flavor (honey is perfect as a sweetener for this recipe)

What to do:

1.Blend all, preferably with some ice
2.Slowly sip and enjoy the flavor. And keep your pinkie out. Its Friday the 13th!


DSC03013

My beautiful mulberries.


DSC03020

My even more beautiful mulberry smoothie.

Friday, February 6, 2009

Homemade Pasta

I love pasta.

First of all carbs, cheese and meat make me a very happy person :)

Second of all I lurve Italian food. For some reason it really goes well with my palette.

If that wasn't enough if it is... ahem made fresh and with wholewheat flour?? what more do I want in life? :D

I made this from scratch, by hand, without any machine or anything.

What you need:

3 cups of wholewheat flour
2 tbs EVOO (for those who don't know/love Rachel Ray, evoo stands for extra virgin olive oil)
2 eggs
Salt as per taste
just a drop of water for kneading (only if needed)
lots of water for cooking


What to do:

1. Mix all the ingredients except for the water and knead for a good 15 minutes to form a reasonably firm dough. If the dough is too firm add a little water (do not over do it)

2. Roll out thinly. Cut into any shape you want.

3. Spread out the pasta onto trays and leave to dry for 2 hours.

3. In a large saucepan heat a lot of water till boiling add salt if wanted. Drop the pasta into the bubbling water and cook for no more than 3-5 minutes. Overcooking will ruin the pasta.

4. Drain pasta and use as desired.

Be sure to consume the pasta within two days. Since it's fresh and preservative free, it doesn't keep well for long.


DSC02942

my pasta, drying


DSC02948

The cooked, drained pasta; still steamy.


DSC02954

What I did with my pasta :)

Friday, January 16, 2009

Organic, vegan, low fat, paper thin PIZZA!

I hope you die hard sloppy-joe lovers don't hate me for desecrating the full fat, soft, cheesy, deep pan pizza.

All my experiments generally start with a craving and this time it was pizza. I created something that is remotely close to a pizza as we know it but is still technically a pizza.

It was delicious in an organic, vegan, low fat way and it was a fun eat.

DSC02855

What you need: (for two large pizzas)

(For the base)
2 cups wholewheat/ grain flour
5 gm fresh yeast
1 tsp EVOO
salt
water

(For the topping)
1 cup grated firm tofu (buy it or make you own)
¼ cup shredded cabbage
¼ cup sliced mushroom
2 tbs peas
¼ cup chopped bell pepper
1 red onion finely chopped
2 flakes finely garlic chopped
1 green chilli chopped
EVOO to saute
Oregano and salt to taste

(For the sauce)
2 tbs barbeque sauce
¼ cup tomato ketchup
¼ cup tomato puree/paste
fresh basil leaves, torn
2 tbs water

What to do:

(Base)
1. Mix all ingredients for the base and work into smooth dough. Leave to rise in a drought free place.

(Topping)
2. Heat evoo in a wok. Stir fry vegetables starting with garlic, chillies and onions then adding the rest (except for the tofu). Add salt and oregano as per taste. Stir fry for only about a minute.

(Sauce)
3. In the same wok add the ingredients for the sauce and simmer for a minute.

(Assemble)
4. Punch out the risen dough and roll out till paper thin. Top with sauce, then vegetables and sprinkle the grated tofu all over. Bake in a 180°C preheated oven for 20 minutes then reduce heat to 100°C and bake for 20 minutes more till the base is crisp.

DSC02858

Friday, January 9, 2009

Reduced fat apple filled bread

I concocted this one. The thing was that I wanted to make something like an apple pie or a tart but I had just bought some fresh yeast that I didn't want to waste and I also wanted to avoid all the calories that go into a tart!

So I settled for apple filled bread.

What you need:

2 med sized dessert apples
2 cups of wholewheat flour
2 sticks of cinnamon
¾ cup sugar/ sugar substitute as per taste(if using sugar substitute, add 1/4 cup water along with it)
a squeeze of fresh lemon juice
10 gm of fresh yeast
1 tbs butter
1/4 tsp salt
Water for kneading.

What to do:

(For the filling)
1. Peel, core and finely chop the apples. Place on low in a heavy saucepan add 3/4 of the sugar/ substitute, cinnamon and simmer for 15-20 minutes till mixture is thick and sauce like. Add half the butter into the slightly cooled sauce.

(For the bread)
2. Mash the yeast in water and combine it with the flour, salt; remaining sugar and butter. While adding plenty of water, work with dough for 15 minutes till elastic. Keep aside in a drought free place to rise for 40 minutes.

3. After the dough is double its size, punch it and work for another 10 minutes.

4. On a floured surface roll out the dough to a 1/4 inch thickness and cut edges of dough to make a rectangle. Cut smaller rectangles from the same.

5. Preheat the oven to 100C. Place a spoonful of the apple filling at the base of each rectangle. Roll and seal edges. Let it rise for another 15 minutes.

6. Bake for an hour till browned outside and soft inside.


DSC02777

Sunday, December 21, 2008

Super Easy Diced Salad

Its time for another Salad! I invented this last night. It was fabulous and one the easiest dressings I ever made!

I may sound idiotic posting this because you don't need to be a genius to invent this recipe but I have to tell you that it's the right combination of vegetables and fruits that make this salad a hit.


What you need: (Serves 2)

1 Cucumber, diced
1/2 an Apple, diced
1 small Carrot, diced
1 Pineapple Ring, diced
Sprigs of mint to garnish
2 tbs yogurt
1-2 tsp honey
a pinch of salt

What to do:

1. Mix yogurt with honey and salt and stir in the diced veg and fruit.
2. Enjoy!


Honey fruit salad

Tuesday, December 16, 2008

Wholemeal English Muffins

I always look out for something interesting to make for breakfast because there are such limited nutritious breakfast choices. At my place It's generally eggs or cereal and it can really get monotonous for me.

These Wholemeal English Muffins (I pointed out the differences between the British name and the American name in my last post) are just so easy to make and can be eating with anything you want. I made these all the more nutritious by using a blend of soy, oat, barely and whole grain wheat flour another one of my concoctions.

What you need: (Makes 4 small sized muffins)

1 cup of wholegrain flour/ or you can experiment with different flours like I did.
5 gm fast-action dried yeast
A pinch of sugar
Salt to taste
water to bind

What to do:

1. Prepare yeast with warm water and sugar.
2. Mix flour with salt and place in a mixing bowl and make a well in the center. Add the fermented yeast and knead. Add water as per requirement.
3. Keep aside for an hour in a dry place.
4. When doubled in size punch back and form four balls with them and leave aside for another 30
5. A little trick that I use: I microwave the ball shaped dough for 1 minute on 60% power instead of waiting for them to rise again. It's a smart thing to do, it saves you time and you can be certain that you wont have partially uncooked muffins.
6. Heat a griddle with some pan spray or just a hint of olive oil and cook on both sides, covered; for about 7 minutes till well done. Do not let the griddle get too hot or the muffins will burn from the outside while remaining raw from the inside.
7. Cut in the center and serve with anything you like.


So how do you like them?

Sweet: (Nutella filling)
Sweet Eng Muffin

or

Salty: (omelet filling)
Salty eng muffin

Tuesday, November 18, 2008

REALLY Low Fat Strawberry Cheesecake

I've been really trying to cut down on the calories but It's so hard to do with my sweet tooth. I almost always crave for dessert. I often just chew on fruits to curb my sugar attack but today I needed something more.

I made a cheesecake. You must think I must be totally out of my head to even consider that a term that contains the words "Cheese" and "Cake" could ever be low fat. I'm here to prove you wrong. I made a Strawberry Cheesecake without cheese and strawberries.

What you need:

1 package strawberry flavored low-fat, sugar-free pudding mix. [One that asks you to mix 750 ml (3cups) to it]
1 cup of low-fat yogurt, hung for 2-3 hours or just use a really creamy variety without the hanging
1 cup of muesli
1 tbs melted butter or yogurt whey
1 tbs powdered gelatin
1 bar strawberry fruit bar (optional)

What you need to do:

1. Prepare pudding as per instructions only one major modification: reduce the 750 ml(3cups) of milk to 500(2cups) ml of milk. You need to get a really thick and extra sweet pudding. Leave aside to cool.

2. Crush the muesli in a bowl and pour melted butter or whey (makes it slightly soggy but if your really cutting down this is the way to go) and line in a clip cake tin or quiche tin. Freeze for 10 minutes.

3. Puree the cooled pudding with the yogurt and pour into a mixing bowl.

4. Dissolve gelatin in hot water and pour into the pudding mix, stir vigorously. Pour over muesli lined tin. Refrigerate for 2-3 hours till firm and set.

5. Cut pieces of the strawberry bar for garnish.(optional)

6. Cut into REALLY large slices and enjoy; you can afford to!


The pudding should look this thick:

q-DSC02084


And that's the final cheesecake:

q-DSC02094


q-DSC02104

q-DSC02105

Friday, October 31, 2008

Oh Soy!

I saw this show on T.V. a while ago teaching you how to make soy milk and tofu at home without any fancy gadgets.

I was so fascinated by its ease that I bought 2kg of soy beans that very day. It was simple, you were supposed to soak the beans in water overnight and blend them with water the next day. After that you simply needed to push it through a cheesecloth and presto! Soy Milk!

You could boil that Soy milk with a little coagulant and voila! tofu! I did it for two days in a row, smug as ever about my great achievement. And then that evening my ego deflated.. big time. I fell ill. Got a disgusting nauseous feeling and I knew it had to be the tofu.

I did not want anything to do with tofu or soy milk for weeks. And then I read this article on Bryanna's Blog. She clearly mentioned two critical things:1. Soak the beans in boiling water and 2. Boil the milk for about a half hour!

So the reason for the naueseousness was undercooked soy milk!
So I did it again.. only this time I did it right! wow I feel great! the tofu tasted even better than before and no nauseous feeling this time!


What I did:

q-DSC01676

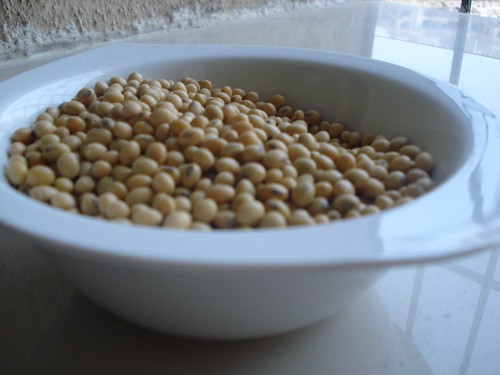
took 2 cups of soy beans and soaked them in boiling water over night


q-DSC01717

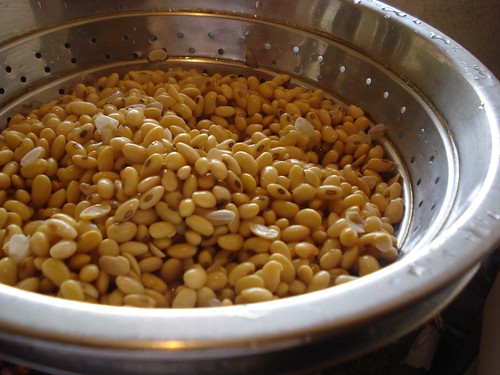
next morning this is what happened; the beans just blew up!


q-DSC01726

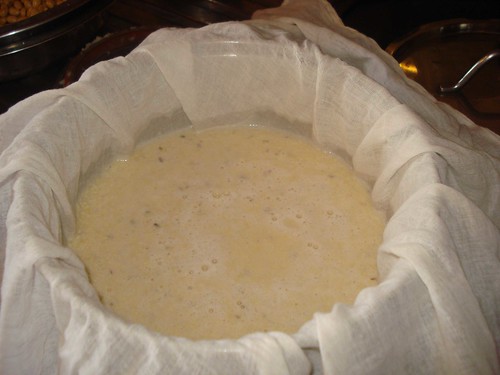
Then I had to grind them first with a little water and then more water till I got this thick paste.. which I pushed through a cheesecloth, and that lovely amber liquid is the Soy Milk!


q-DSC01730

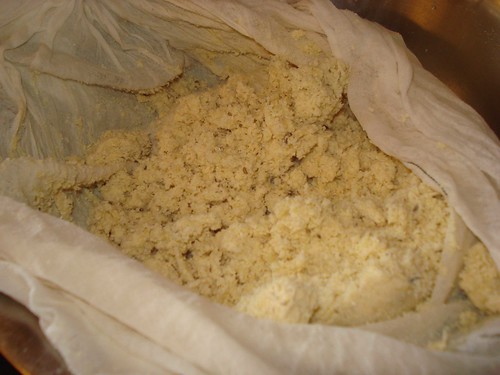
I had to wind the cheesecloth several times and completely squeeze out the soy milk till this is how the husk looked; completely dry. If you don't feel like throwing this away, don't! u can always use this as a replacement of soy protein in dishes.. but remember to cook for at least 1/2 an hour, because I learned the hard way, you don't need to do that :)


You boil the lovely amber colored soy milk till it almost boils over on a high flame. Then reduce the flame to low and cook for about a half an hour, stir frequently. Turn off the flame.


When the milk is a little cool, turn on the heat again and add about 2-3 teaspoons of vinegar and see if it starts breaking up.. if it does, you don't need to add more if it doesn't, add more!
Push this through a cheesecloth and place in a colander and weigh down with any heavy object.


q-DSC01734

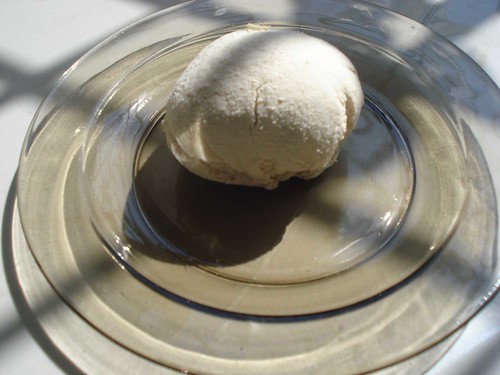
Once dry ease away from the cheesecloth, and behold! Tofu!

You can stop reading here and do you own thing with the tofu. You can store it in the refrigerator in a little water and be sure to change the water everyday. But if you want to know what I did with it.. read on!

q-DSC01742

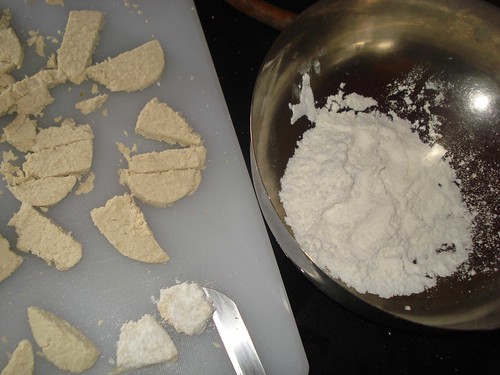
I sliced them up.. it is a bit crumbly. I put some rice flour in a bowl and mixed it with a bit of salt and oregano and dipped the pieces of tofu in it.


q-DSC01749

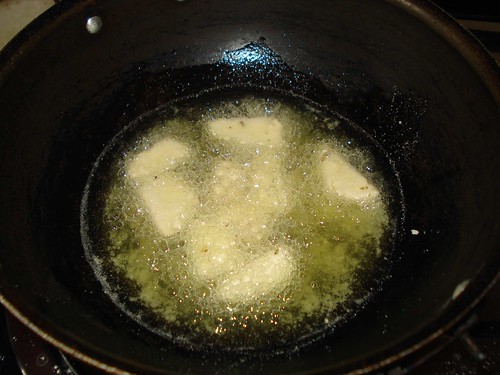
and fried them. The reason I dipped them in rice flour is because it gives a wonderful crisp coating and at the same time rice flour absorbs less oil than wheat flour.


q-DSC01750

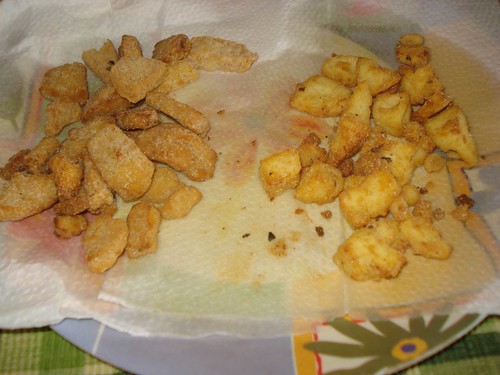
Drain them on paper towels.. OK I cheated. I coated pieces of cottage cheese with the same flour and flied them after I fried the tofu. Can u guess which is what?


q-DSC01754

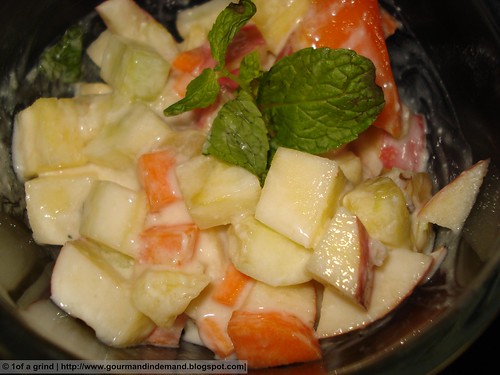
These taste great with any kind of sauce. You can eat them just this way or do what I did above, stir fry them with veggies and any stir fry sauce! YUM!

What a day!

Tuesday, October 28, 2008

'Tang'y Fruit Salad


I'm on this whole health food kick.

I love eating fruit salad not only because its nutritious and all that, but because it is delicious especially when its made with the freshest seasonal fruits you can find. But what I look for in a fruit salad is the individual taste of every fruit and I hate when the fruit salad is so over 'tossed' that it tastes like one big bowl of fruit puree.

I don't believe in making something simple like fruit salad overly calorific by dressing it with any kind of rich dressing. But I have a trick that makes the most brilliant fruit salad while keeping it simple and low cal.

What you need:

3 cups. of a bunch of your favorite fruits, De-seeded and diced into small pieces. Choose fruits with a firm flesh so that they retain their shape after being tossed about. I used apples, pomegranate, oranges and kiwi (I know it mashes up but I put it right in the end)

1/4 cup. (optional) mixed nuts and dry fruits (almonds, walnuts, dried figs and raisins)
2-3 tsp. of Orange flavored 'Tang' or any similar drink powder.

1/2 tsp. (optional) Indian Chaat Masala- you can buy it or make your own


What to do:


1. Place the firm fleshed fruit in a big bowl

2. Put in half the nuts and dry fruit in the bowl and toss gently

3. Sprinkle tang and chaat masala all over and toss again. Let it sit for a while in the fridge.

4. Before serving sprinkle the remaining nuts and fruits and the mashy fruit if any and eat!


The Tang serves two purposes: an easy dressing and prevents fruit discoloration because of the citric acid in it. Isn't that cool?